Lime render repair means cutting out cracked, hollow or frost-damaged areas back to sound render and rebuilding them in a matching lime mix, in the same number of coats, with the same texture and finish, then limewashing to blend it in — never patching with cement, sealing with waterproof paint or pressure washing. Regular maintenance is simple: check the walls each spring and autumn, keep gutters, downpipes and sills sound, and renew limewash every few years where it’s used. As an indicative guide, small crack repairs typically cost around £150–£400, a blown or hollow patch £300–£800, and larger areas £800–£2,500. Lime repairs are best done between spring and early autumn, away from frost.
- Repair lime render with lime, matched in mix, texture and colour — never cement.
- Inspect walls each spring and autumn; fix water sources first.
- Limewash is a sacrificial, renewable finish — renew it every few years.
- Tap-test for hollow areas; cut back only to sound render.
- Small lime repairs typically cost indicative £150–£400; larger areas indicative £800–£2,500.
- Lime work needs frost-free weather to cure: spring to early autumn.
Why lime render needs a different approach
Lime render is designed to be the weakest, most flexible and most porous layer on an old wall. It lets moisture move in and out, it accommodates slight movement, and it takes the wear so the brick or stone behind doesn’t have to. That’s exactly what makes it good for solid-walled buildings, and it’s also why it needs a different maintenance mindset from modern render.
A lime render will show its age. Fine cracks, gentle erosion on exposed corners and the odd hollow patch are normal over the decades, and none of them is a disaster if dealt with promptly and in the right material. Problems become serious when water is allowed to get in and stay in, when frost gets to work on saturated areas, or when well-meaning repairs in cement or modern coatings trap moisture.
The aim of maintenance is simple: keep water away from the render where you can, keep the surface breathable, and repair small defects early in lime. If you’d like the background on how lime render works in the first place, our lime render page is the place to start.
A simple inspection routine
Twice a year — in spring, after the worst of the frosts, and in autumn, before winter — walk round the house and look at the render from ground level, with binoculars for high areas. It takes half an hour and catches most problems while they’re small.
Look at the walls for: new or widening cracks; areas that look bulging, blistered or flaky; patches where the surface is powdering, eroding or exposing the aggregate; dark damp patches that persist after dry weather; white salt deposits; green or black staining; and any old cement patches showing cracking around their edges.
Look at the things around the walls: gutters and downpipes (blocked, leaking or loose); window sills (cracked, or not throwing water clear of the wall); flashings at chimneys and roof junctions; the bottom of the wall (render touching the ground, soil or paving built up against it, or plants growing on it); and overflow pipes or condensate pipes discharging onto the render.
Tap-test anything suspicious. Gently tapping the render with a knuckle or the handle of a screwdriver tells you whether it’s bonded (a solid, dull sound) or hollow (a drummy, hollow sound). Mark hollow areas with chalk and photograph them.
Keep a simple record: dated photos of each elevation and close-ups of any defects. Comparing them year to year shows whether a crack or patch is stable or getting worse, and it’s valuable information for any specialist you call in.

Renewing limewash
Where a lime render is finished with limewash, the limewash is the first line of defence. It’s a thin, breathable, sacrificial coating that weathers away gradually, especially on exposed elevations, and it’s meant to be renewed. Typical intervals are every few years, sooner on walls facing the prevailing weather and later on sheltered ones.
Renewal is straightforward in principle. Loose and flaking material is brushed off with a stiff bristle brush — not a wire brush or pressure washer. The wall is dampened so the new limewash doesn’t dry too fast. Limewash is then applied in several thin coats, worked well into the surface, with each coat allowed to dry before the next. It should be applied in mild, damp-ish weather, protected from hot sun, frost and heavy rain while it cures.
Fresh limewash looks darker and more translucent when wet and dries much paler, so judge the colour only when dry. If you’re using a tinted limewash, keep a record of the recipe or product so future coats match. Our guide to lime render vs limewash explains how the two work together.
Renewing limewash on a single-storey wall is a task some confident owners take on, but anything at height needs safe access and is best combined with other maintenance that needs scaffolding. Never switch from limewash to a conventional masonry paint: it can trap moisture in the render and wall, and on a listed building the change may need consent.
Cracks in lime render
Fine hairline cracks are common in lime render, particularly where it meets openings or follows old movement in the wall. Many are harmless, and lime’s ability to partly heal fine cracks as free lime is washed into them and carbonates means some close up over time. Limewash renewal often fills and hides them.
Wider or open cracks are different. Anything that lets rain run in, particularly on an exposed elevation or under a sill, should be repaired before winter. Water in a crack can freeze, widen it and start to detach the surrounding render.
Cracks that keep coming back, or that are stepped, tapered or growing, may reflect movement in the building rather than a render defect. In that case the cause needs investigating before any repair, sometimes by a structural engineer.
Repairs to cracks in lime are usually done by raking out the crack into a slight V or cutting out the cracked strip, dampening it, and filling with a matching lime mortar in thin layers, pressed well in. Our general guide to render cracking explains how to read crack patterns on any render.
Hollow areas and delamination
A hollow or delaminated area is where the render has lost its bond with the wall, or one coat has separated from another. It sounds drummy when tapped and may bulge slightly. On lime render, small hollow areas are often stable for years, but they’re vulnerable: water can collect behind them, freeze, and push them off.
Common causes include water getting in through a crack or defective sill, frost action over many winters, original application onto a dusty or overly dry wall, coats applied too thickly, and movement.
The usual repair is to cut out the hollow area back to sound, well-bonded render, with slightly undercut edges to help the new lime key in. The exposed masonry is cleaned, any loose mortar raked out and repointed in lime, and the area rebuilt in coats. On historic buildings, small hollow areas that are otherwise sound are sometimes left or re-secured rather than removed, to keep historic material. Our guide to blown render explains tap-testing and mapping hollow areas in more detail.
Frost damage and surface erosion
Frost damage typically appears as a crumbling, flaking or powdery surface, sometimes with the outer coat breaking away in thin sheets. It happens when render that is saturated freezes, and it’s most common low down on walls, below leaking gutters or sills, and on elevations facing the prevailing weather. Newly applied lime that freezes before it has cured can fail in the same way, which is why lime work is avoided in frosty weather.
Surface erosion is the slow wearing-away of the outer surface on exposed elevations and corners. It’s a normal part of lime’s sacrificial role. A little erosion can be addressed by renewing limewash; deeper erosion exposing the coarse aggregate of the base coat needs a new finish coat over the affected area.
In both cases, ask why that area is getting so wet. A dripping gutter joint or a sill without a drip is often the real culprit, and fixing it is part of the repair.
Old cement patches causing damage
One of the most common problems on lime-rendered houses is earlier repairs done in cement. Cement is harder, more rigid and much less porous than lime. A cement patch in a lime render creates a hard, impermeable island: moisture moving through the wall is diverted around its edges, where it concentrates, and the surrounding lime and masonry deteriorate. Often you’ll see cracking around the edge of the patch, the patch itself sounding hollow, or the lime around it eroding faster than elsewhere.
The fix is to remove the cement patch carefully — it may be stronger than the brick or stone it’s stuck to, so it needs cutting out by hand rather than prising off — repair any damage to the masonry, and rebuild the area in a matching lime. Cement pointing under or near the render may need the same treatment.
If the whole wall turns out to be cement render rather than lime, that’s a bigger question; our lime vs cement render guide explains why the difference matters so much on solid walls.
Salts, staining and green growth
White salt deposits (efflorescence) show that water is moving through the wall and evaporating at the surface, leaving salts behind. On lime render they’re a symptom rather than a defect: brush them off dry, and look for the source of the water. Persistent heavy salts low on a wall can point to rising or penetrating damp or to soil and paving built up against the wall.
Green or black staining from algae and organic growth tends to appear on shaded, damp walls and below drips. It’s mainly cosmetic, but it shows where water is lingering. A soft brush and clean water, or a gentle biocide compatible with lime used as directed, will usually deal with it; limewash is alkaline when fresh, which discourages growth. Our guide to algae on render covers cleaning methods in general.
Rust or dark streaks usually come from metal fixings, brackets or old pipework. Remove or replace the source and the staining often weathers out.
How a lime patch repair is done properly
A well-done lime patch repair follows a consistent sequence.
1. Find and fix the cause. Gutters, sills, flashings, ground levels or a cement patch nearby.
2. Mark out the area. Tap-test to find the full extent of hollow or damaged render, and mark it. On unpainted or limewashed walls, the repair is often taken to a natural break such as a corner, string course or opening so it’s less visible.
3. Cut back to sound render. By hand or with light tools, with clean, slightly undercut edges. Avoid damaging the masonry underneath.
4. Prepare the wall. Rake out loose mortar, repoint where needed in lime, brush off dust and dampen the masonry and surrounding edges evenly.
5. Rebuild in coats. Matching the original number and thickness of coats where possible, with hair or fibre in the base coats if the original has it. Each coat is scratched or keyed, kept damp and allowed to firm up before the next.
6. Finish to match. Floated, roughcast or textured to blend with the surrounding render.
7. Cure and protect. Shade from sun and wind, protect from rain and frost, and mist as needed.
8. Limewash. Once cured, limewash over the repair and a margin around it, or the whole elevation, to unify the colour.
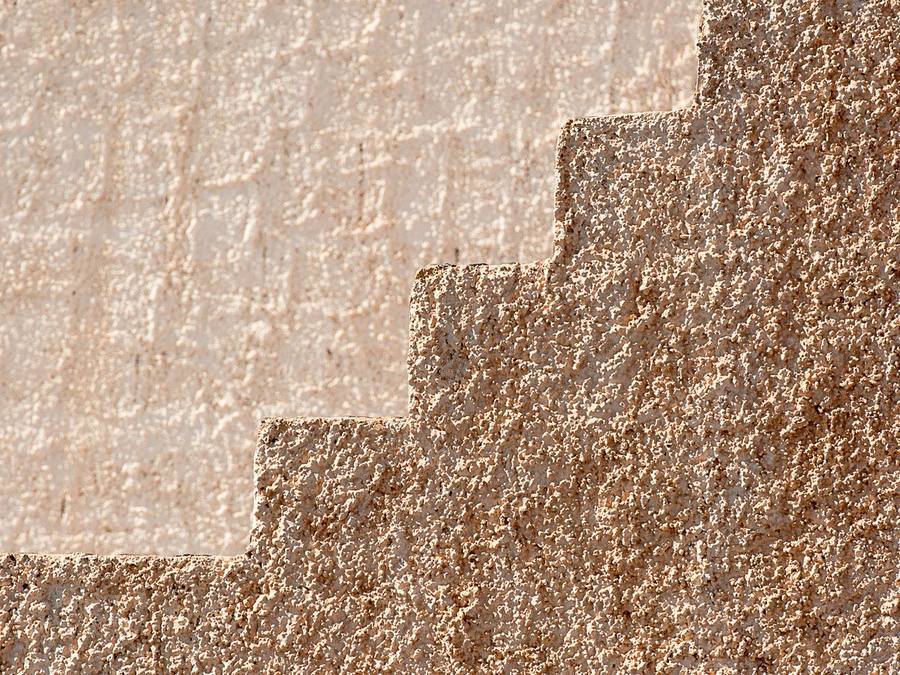
Matching mix, texture and colour
The repair should be no stronger than the original render and as close as practical in appearance. A specialist will look at the existing render’s hardness, colour and texture, and often at a broken piece in cross-section to see the number of coats, the sand and whether hair was used.
Mix. On many houses, a lime putty or weaker natural hydraulic lime (NHL) mix is used to match a soft original. Our explainer on hydraulic lime render covers how grades are chosen.
Sand. The sand gives most of the colour and texture. Matching it is often the hardest part of a convincing repair, and specialists may blend two or three sands to get close.
Texture. Floated, roughcast or textured finishes need reproducing with the same tools and technique.
Colour. Fresh lime is darker when wet and lightens as it dries and carbonates, so a repair can look wrong for weeks before settling. A small trial patch, left to dry, is the best guide. Limewash over the finished repair usually does the most to make it disappear.
Expect a repair to be visible for a while. On an unpainted lime render, it may take a season or two of weathering to blend in fully.
What not to do to lime render
Most serious damage to lime render is caused by well-meant mistakes. Avoid these.
Patching with cement or ready-mixed filler. They are harder and less porous than lime and cause the surrounding render and masonry to deteriorate.
Waterproof or plastic masonry paints and sealers. They trap moisture in the render and wall, which then shows up as blistering, damp inside and frost damage. If a previous owner has painted lime render with a non-breathable paint, ask a specialist how best to deal with it.
Pressure washing. High-pressure water erodes soft lime, drives water deep into the wall and can blow off weak areas. Use a soft brush and low-pressure water.
Silicone sealant in cracks. It traps water behind and makes a proper repair harder later.
Repairs in winter. Lime that freezes before it cures will fail.
Stripping sound render. If most of the render is bonded and serviceable, removing it creates cost and risk for no benefit.
Raising ground levels against the wall. Soil, paving or decking above the base of the render feeds water into it.
Lime render needing repair? SmartMatch™ pairs you with one vetted local specialist with lime experience for a free survey and written quote.
Get a free quote →When to carry out lime render repairs
Lime repairs are best done between spring and early autumn, when there’s little risk of frost during curing and temperatures are mild. Very hot, sunny or windy weather is also a challenge, because lime that dries too fast loses strength and bond; specialists shade and mist the work to manage it. Late spring and early autumn are often the most comfortable windows.
If you discover a defect in late autumn or winter, don’t try to rush a lime repair. Make it safe and keep water out temporarily — clear the gutter, divert the downpipe, have any loose render that’s a hazard carefully taken down — and book the proper repair for spring. Good lime specialists are often busy in the main season, so getting on their list over winter is sensible.
When re-rendering makes more sense than repair
Patch repair is the right answer for most lime render problems, and on historic buildings the principle is to keep as much original material as possible. But there comes a point where re-rendering an elevation is better value or better for the wall.
Signs that point towards re-rendering include: hollow areas across a large proportion of the elevation; repeated repairs that keep failing around their edges; widespread frost damage and erosion through to the base coat; a render that turns out to be largely cement, or a lime render covered in non-breathable paint that can’t be removed; and a patchwork of old repairs in different materials that is causing more trouble than it’s worth.
A specialist should explain the balance honestly: the cost of a series of patches against a fresh render, the age and condition of what’s there, and what it means for the wall. Our guide on whether to repair or replace render sets out the general decision.
What lime render repairs typically cost
Repair prices depend on the size and number of areas, access and scaffolding, the amount of masonry repair underneath, how carefully the finish has to be matched, and whether limewash is included. Lime work is slower than modern render, because of curing time between coats. As indicative guides:
| Repair | Indicative cost |
|---|---|
| Small crack repair | £150–£400 |
| Blown or hollow patch | £300–£800 |
| Larger area or multiple defects | £800–£2,500 |
| Lime render, per m² installed | £70–£125 |
indicative Ballpark figures, not fixed prices. Scaffolding, masonry repairs and heritage requirements are priced separately and vary widely, so ask for them itemised.
Our render repair cost guide covers repair pricing more broadly, and the lime render cost guide covers full lime re-renders. Our house rendering cost guide covers whole-house budgets.
Repairing lime render on a listed building
If your home is listed, even repairs need some thought. Small, genuinely like-for-like repairs in matching lime are often treated as repair, but removing historic render, changing the texture or colour, or re-rendering an elevation can need listed building consent, and carrying out works that need consent without it is a criminal offence in England. Speak to your council’s conservation officer before work starts, and keep their advice in writing. Our guide to rendering a listed building explains the process.
What to ask a lime repair specialist
What do you think has caused this damage, and how will you deal with the cause?
How much will you cut out, and how will you decide where to stop?
What lime and sand will you use, and how will you match the existing render?
How many coats, and how will you protect them while they cure?
Will you limewash over the repair, and how far?
How visible will the repair be, and for how long?
Are there old cement patches that should come out at the same time?
Would re-rendering this elevation be better value over the long term?
A specialist who answers in terms of your walls — and who’s happy to show you lime repairs they did a few years ago — is worth listening to. Our render repair page explains how we approach repairs generally.
When the problem isn’t really the render
Lime render often gets blamed for problems that start elsewhere. A blocked gutter soaking one corner, a sill with no drip, a leaking flashing at the chimney, a condensate pipe dripping onto the wall, or paving built up above the damp-proof level can all cause the defects described here, and repairing the render without fixing them will only buy a winter or two. Damp inside may also come from condensation, plumbing leaks or problems with the roof. And if cracks are wide, tapered or growing, especially with cracking inside, have the building itself assessed first.
When the render does need professional work, SmartMatch™ weighs render-type experience, verified reviews, online reputation, insurance and accreditation to introduce you to one vetted local specialist for a free, no-obligation survey and written quote. Most of our specialists take on projects from around £3,500, so they’re best suited to larger repairs and re-renders; for a single small job, a local builder or plasterer may be quicker. Our lime render page explains how we match lime projects, and our exterior rendering guide covers the wider choices.
Frequently asked questions
How do you repair lime render?
Can you repair lime render with cement?
How much does lime render repair cost?
How often should limewash be renewed?
Why is my lime render crumbling?
Is hairline cracking in lime render a problem?
Can I pressure wash lime render?
Can I paint lime render with masonry paint?
When is the best time of year to repair lime render?
When should lime render be replaced rather than repaired?
Get your lime render repaired properly
Tell us about your property and SmartMatch™ pairs you with one vetted local render specialist for a free, no-obligation survey and written quote.
Get a free quote →