Render repair fixes localised problems — cracks, blown or hollow sections, staining and patches — without re-rendering the whole house. The key is diagnosing the cause first (movement, trapped damp, frost or poor original work), then cutting out and patching the affected area to match. Small repairs often cost £150–£600+, far less than a full re-render. Timely repair is the smart, economical side of rendering.
Done early, a repair stops water getting behind the render and turning a small problem into a whole-wall failure. The diagnosis matters more than the patch.
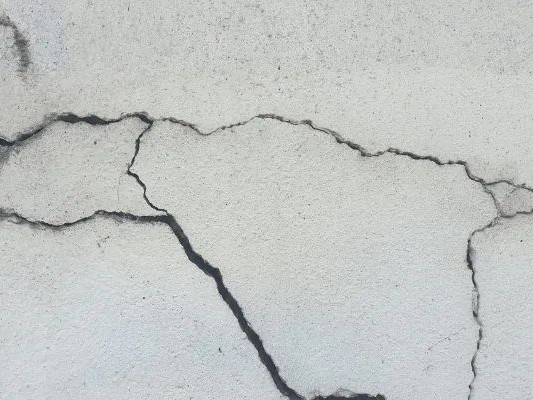
- Fixes localised cracks, blown/hollow areas, staining and patches without re-rendering everything.
- Diagnosis comes first: cracking and blowing are symptoms, so the cause must be found and fixed.
- Common causes: building movement, trapped damp, frost damage, and poor original application.
- Small repairs often £150–£600+, hugely cheaper than a full re-render if caught early.
- Matching colour and texture on weathered render is the trickiest part of a good repair.
What is render repair?
Render repair is the targeted fixing of localised render problems — a crack here, a blown patch there, staining around a downpipe — rather than stripping and re-rendering an entire property. For many homeowners it's the most cost-effective intervention of all: catch a problem early, fix the small area, and you avoid the far larger cost of a full re-render down the line.
The single most important principle is that cracks and blown render are symptoms, not the disease. Render fails for a reason — the wall is moving, moisture is trapped behind it, frost has got into a crack, or the original work was poor. Simply slapping new render over the symptom without addressing the cause means it will fail again, often quickly. A good repair therefore starts with diagnosis, not a trowel.
Common problems include hairline and structural cracks, "blown" or hollow render that has debonded from the wall (you can hear it sound hollow when tapped), spalling and frost damage, organic staining and algae, and unsightly patch repairs from earlier botched work. Each has a different cause and a different correct fix, which is why an experienced eye matters so much.
What causes render to fail?
- Building movement — settlement, thermal movement or subsidence cracks rigid render. The crack pattern tells a specialist a lot about the cause.
- Trapped moisture — water behind the render (from a non-breathable finish on an old wall, a leak, or rising/penetrating damp) pushes the render off and causes blowing.
- Frost damage — water gets into a crack, freezes, expands and breaks the render apart over winters.
- Poor original application — a too-strong mix, missing mesh, bad prep or applying in the wrong weather all shorten render's life and cause early cracking or debonding.
- Failed detailing — missing or damaged sills, copings, drips and flashing let water track onto and behind the render.
Understanding which of these is at work is the whole game. A crack from minor thermal movement is a simple fix; a crack from ongoing subsidence needs the structural cause addressing first. A blown patch from a one-off leak is straightforward; widespread blowing from a non-breathable render on a solid wall points to a bigger conversation about the right finish.
How is render repaired?
- Inspection and diagnosis — identifying the cause, tapping for hollow areas, and checking detailing and moisture.
- Addressing the cause — fixing the leak, damp source or detailing problem before any patching.
- Cutting out — removing the failed render back to sound, well-bonded edges.
- Re-rendering the patch — rebuilding the area with a compatible render (and mesh where needed), feathered into the surrounding finish.
- Matching — texturing and, for painted render, colour-matching; on self-coloured render, blending a patch is harder and is discussed up front.
The trickiest part is usually the match. Weathered render has aged, and self-coloured renders in particular can be very hard to patch invisibly. A good specialist is honest about this — sometimes the best result on a prominent elevation is to re-render a whole face rather than leave a visible patch.
Benefits of timely render repair
- Far cheaper than re-rendering — fixing a small area costs a fraction of a whole-house job.
- Stops water ingress — sealing cracks and blown areas prevents water getting behind the render.
- Prevents escalation — a small crack left alone becomes frost damage and then whole-wall failure.
- Protects the wall beneath — keeps the masonry dry and sound.
- Maintains appearance and value — tidy walls protect kerb appeal.
- Buys time — sensible repairs can extend the life of an otherwise sound render for years.
Spotted cracks or hollow render? Get a free, no-obligation diagnosis and quote from one vetted specialist.
Get a free quote →Things to consider
- Diagnosis is essential — repairing the symptom without the cause wastes money. Insist on understanding why it failed.
- Matching limitations — patches on weathered or self-coloured render can show; sometimes a full elevation is the better result.
- Repair vs re-render — if a wall is failing in many places, repeated patching can cost more than a fresh finish.
- Underlying issues — widespread blowing on an old solid wall may indicate the wrong render type (cement where lime belongs).
- Structural cracks — significant or progressive cracks may need a structural assessment before any render work.
How much does render repair cost in the UK?
Repairs are priced by job rather than purely per m², depending on size, access and cause. Rough guides:
| Repair | Typical cost |
|---|---|
| Small crack repair | £150–£400 |
| Blown/hollow patch | £300–£800 |
| Larger area / multiple patches | £800–£2,500 |
| Re-render a single elevation | £1,500–£5,000+ |
Budget figures only. Scaffolding for higher repairs is often the biggest single cost. The cause and extent set the price — a survey gives an accurate quote.
What affects the price?
- Access and scaffolding — a high repair needing scaffold can cost more in access than in render.
- Size and number of areas — one patch versus many.
- The underlying cause — fixing a leak, damp source or detailing adds to a simple patch.
- Matching difficulty — blending self-coloured or weathered render takes more skill and time.
- Repair vs whole elevation — sometimes re-rendering a face is the more economical, better-looking option.
- Region — labour rates vary nationally.
Repair vs full re-render
| Repair | Full re-render | |
|---|---|---|
| Cost | Low | High |
| Disruption | Minimal | Significant |
| Appearance | Patch may show | Uniform fresh finish |
| Best when | Localised, sound elsewhere | Widespread failure or upgrade wanted |
If your render is generally sound with a few isolated problems, repair is the obvious economical choice. If it's failing widely, the wrong type for the wall, or you're ready to modernise the look, a full re-render — in silicone, monocouche or, for an old wall, lime — may be better value than repeated patching. A specialist will tell you honestly which way the numbers point.
Is render repair right for your situation?
- Isolated cracks or blown patches on otherwise sound render — the classic repair case.
- Catching a problem early — before water ingress and frost turn it into whole-wall failure.
- Maintaining a property — keeping an existing finish going for several more years.
It's not the right path when the render is failing across whole elevations, when the wrong render type is the root problem, or when there's an unresolved structural or damp issue that needs a different trade first. A good diagnosis sorts repair-worthy walls from those that need a fresh start.
Maintenance: catching problems early
The best render repair is the one you do small. Walk around the house once or twice a year and look for hairline cracks, hollow-sounding areas, staining, bubbling paint or damp patches. Tackle small cracks before winter so frost can't get into them. Keep gutters, downpipes and sills sound so water isn't constantly running onto the render. This simple habit catches problems while they're £200 fixes rather than £5,000 ones.
Common problems (and how to avoid them)
- Repairing the symptom, not the cause — the cardinal error; always diagnose first.
- Visible patches — from poor matching; managed by skilled texturing and, where needed, doing a whole elevation.
- Trapping damp again — patching over a moisture problem; the source must be fixed first.
- Wrong repair material — using an incompatible or too-strong mix; the patch should match the original render's properties.
How to choose the right render repair specialist
For repairs, diagnostic skill matters as much as trowel skill — you want someone who works out why the render failed and fixes that, then matches the patch as closely as possible and tells you honestly when a whole elevation would look better. RenderSmart's SmartMatch™ weighs experience, verified reviews and reputation to pair you with the one best-fit local repair specialist, so you get a lasting fix rather than a quick cover-up.
Frequently asked questions
How much does it cost to repair render?
Why is my render cracking?
What does 'blown render' mean?
Can you repair render or do I need to redo it all?
Will a render repair be visible?
Should I repair render cracks before winter?
Why does my render keep failing in the same place?
Can render cracks indicate something serious?
Can you repair pebbledash or Tyrolean render?
How do you fix damp behind render?
Is it worth repairing old render?
How long does a render repair last?
Can I repair render myself?
What's the difference between a repair and a re-render?
Get a free render repair quote
Tell us about your property and SmartMatch™ pairs you with one vetted local render repair specialist — for a free, no-obligation quote and survey.
Get a free quote →