A scratch coat is the first coat of a traditional two- or three-coat render, applied directly to the prepared wall and scored with a comb or scratcher while still soft, so the next coat has a mechanical key to grip. Its job is bond, not looks: it anchors the render to the masonry and takes up the worst of the wall’s unevenness. It goes on at a moderate thickness set by the specification or data sheet, and must firm up and shrink before the next coat goes over it. Rushing that wait can cause cracking and hollow render later.
- The scratch coat is the first coat of traditional multi-coat render, keyed to grip the next one.
- Its job is bond and basic levelling, not appearance.
- Wall preparation and suction control decide how well it bonds.
- It should be no stronger than the wall, and the coats above no stronger than it.
- It needs time to firm up and shrink before the next coat goes on.
- Rushed or poorly keyed scratch coats cause cracking and hollow patches later.
What a scratch coat is
Traditional render is built in layers. In three-coat work there’s a scratch coat, a float coat that straightens the wall, and a finish coat. In two-coat work the scratch coat is followed directly by the finish. Either way, the scratch coat is the one that touches the masonry.
It has two jobs. First, bond: it grips the brick, block or stone and gives everything above it something solid to hang from. Second, a first pass at levelling, taking out the deeper hollows so the following coats can go on at an even thickness. It isn’t meant to be neat. A good scratch coat looks rough, evenly scored and slightly open — and it’s the backbone of both traditional sand and cement render and lime render.
Two-coat or three-coat: where the scratch coat sits
The number of coats is decided by the wall, the exposure and the specification, not by habit. A reasonably true, even wall in a sheltered spot can often be done in two coats: scratch, then finish. A wall with bowed sections, mixed materials or a very exposed aspect is more likely to get three, with the float coat doing the main straightening so the finish goes on at an even thickness.
The scratch coat’s role shifts slightly between the two. In two-coat work it has to do more of the levelling, because there’s no float coat to correct it. In three-coat work it can concentrate on bond and leave the fine straightening to the next layer.
If one quote says two coats and another says three for the same house, ask each renderer why. A good answer refers to your wall: how true it is, what it’s made of and which way it faces.
Preparing the wall before the scratch coat
Most scratch coat failures start before any render is mixed. The wall has to be sound, clean and able to hold the coat. That means removing loose render, crumbling pointing and anything that won’t take a bond, such as old paint, then brushing off dust and checking for salts or damp patches that need dealing with first.
Suction is the next question. Very absorbent brick or stone will drag water out of a fresh coat before it can set properly, leaving it weak and powdery against the wall. It’s usually dampened beforehand. Dense, smooth surfaces such as engineering brick or concrete have the opposite problem, offering little grip, and may first get a bonding treatment or a thrown slurry coat (traditionally called spatterdash) so the scratch coat can hold. Mixed walls, with patches of different materials, need both judgements made area by area.
Beads at corners, edges and openings are also fixed at this stage, so the scratch coat can be worked to them. Our guide to render beads explains the types.
Scratching and combing: how the key is made
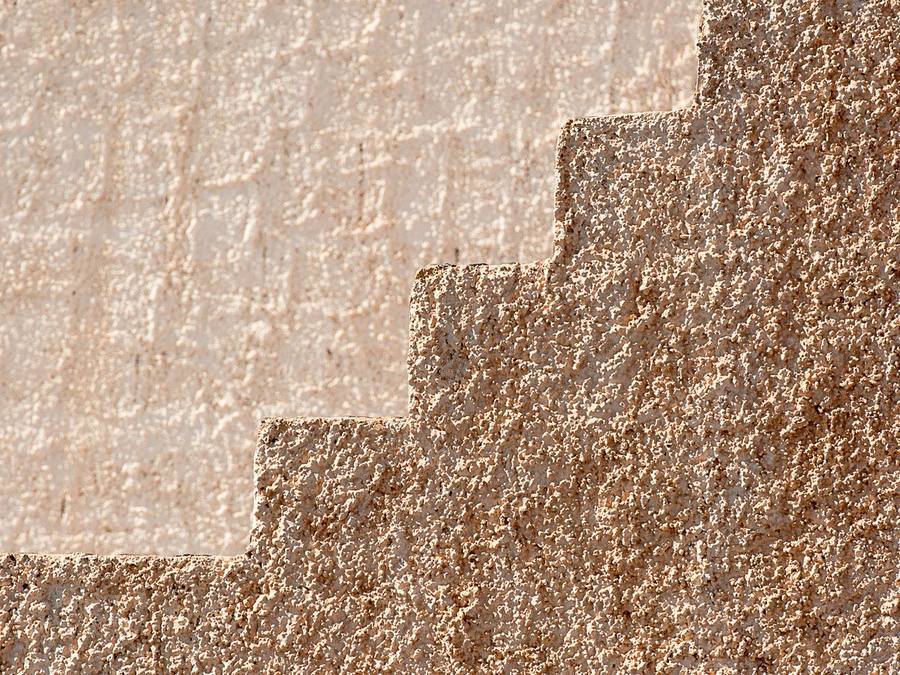
The coat is laid on firmly, pressed into the surface so it fills the texture of the masonry, and then left to stiffen slightly. Once it has, it’s scored across with a scratcher or comb — often in horizontal or wavy lines, sometimes cross-hatched.
Timing matters. Score too early and the lines slump closed; too late and the tool tears the surface. The scores should be deep enough to give the next coat a real grip without cutting through to the wall, and consistent across the whole elevation. A key that’s deep in one corner and barely there in another gives an uneven bond across the wall.
What goes into a scratch coat
On modern masonry, the scratch coat is usually a sand and cement mix, often with lime added to make it more workable and slightly more flexible, or a factory-made bagged base render. Bagged products take the guesswork out of batching, and the manufacturer’s data sheet then sets the thickness, curing and compatible finishes.
On older solid walls, the scratch coat should be lime: either a natural hydraulic lime or a non-hydraulic lime putty mix, often with hair or fibre to help hold it together as it cures. The mix is chosen to be weaker and more vapour-permeable than the masonry, so moisture can move out through the render. Patching a lime scratch coat with cement, or using a cement scratch coat under a lime finish, defeats the point of the system and on historic walls can drive damp and decay into the masonry. Our guide to hydraulic lime render explains how the NHL grade is chosen.
A well-graded, clean sharp sand gives a stronger, less shrink-prone coat than a fine, dirty or single-sized one. On a site-mixed render, consistent batching from one mix to the next matters too, so the coat behaves the same across the wall.
How thick a scratch coat should be
A scratch coat goes on thick enough to cover the masonry and bond to it, but thin enough to cure evenly without sagging. There’s no universal figure: the specification or the manufacturer’s data sheet sets it for your job. It’s worth asking what that figure is, and whether a thickness on the quote means the scratch coat alone or the whole build-up.
The other governing principle is strength. Each coat should be no stronger than the one beneath it, and the render as a whole no stronger than the wall. A hard, rich scratch coat on soft old brick concentrates stress in the masonry and can trap moisture. For how the full system adds up, see our guide to render thickness.
Dubbing out: when the wall needs more than one coat can give
Old walls are rarely flat. Bowed brickwork, rebuilt sections, lintels set proud and hollows where stone has eroded can all leave depressions deeper than a scratch coat should be. Loading the scratch coat on thick to fill them is the wrong answer: a heavy coat sags, cures unevenly and shrinks more, cracking where it’s deepest.
Instead, the deep areas are filled first in thinner layers, each keyed and left to firm up, until the wall is near enough even for the scratch coat to go on at a consistent thickness. This is called dubbing out.
Dubbing out takes time and adds labour, so it’s one of the places a cheap quote can save money in a way you’ll pay for later. If your wall is visibly uneven, ask how the renderer plans to deal with it.
Letting it cure before the next coat
A scratch coat must firm up and do most of its shrinking before the next coat covers it. If the shrinkage happens in the open, its fine cracks are harmless and get filled by the next coat. If it happens underneath a fresh float coat, it drags that coat with it.
The wait is measured in days rather than hours. With cement-based mixes, the manufacturer’s data sheet or specification sets the minimum, and cold, damp weather stretches it. Lime scratch coats generally need longer — often several days for hydraulic lime and more for lime putty — and are judged by touch rather than the calendar.
During that time the coat needs protecting: misted or shaded in hot sun and drying wind, sheeted against heavy rain, and never left exposed to frost. Just before the next coat goes on, a scratch coat that has dried out is usually dampened so it doesn’t pull water out of the fresh layer.
Weather in those first days does the most lasting harm, because this is the layer bonded to the wall: driving rain can also wash out the surface and the key. A south-west facing gable in high summer and a north-facing wall in late autumn may need very different handling on the same house. Our guide to the best time to render covers planning around the seasons.
How the scratch coat shows through in the finish
A homeowner never sees the scratch coat again, but its quality is often visible in the finished wall.
Flatness. Hollows and bumps left in the scratch coat have to be corrected by the coats above. Where they aren’t, the finish follows them, and the wall looks wavy in low, raking light, especially on a smooth or fine-textured finish.
Even suction. A scratch coat of consistent mix and thickness draws water out of the next coat at an even rate. Patchy thickness or mixed batches can make the coat above dry unevenly, which can show as blotchy tone on a painted or through-coloured finish.
Crack lines. Shrinkage cracks that were covered before the scratch coat had settled can reappear as fine lines in the finish, sometimes months later.
So if a finished traditional render looks uneven, the answer is not always in the top coat. A specialist assessing it will want to know how the coats beneath were built.
Scratch coat, float coat, base coat: the terms
The terms overlap, which confuses quotes. “Base coat” is the umbrella for everything beneath the finish; on traditional work that means the scratch coat plus any float coat. On modern thin-coat silicone or acrylic systems, the base coat is a polymer-modified layer carrying mesh, and there is usually no separate scratch coat at all. Our explainer on the render base coat covers the modern types.
Older terms still turn up. In internal plastering, “render, float and set” describes the same three-stage idea, and the first coat on timber lath is the “pricking-up” coat. If a quote uses a term you don’t recognise, ask what it means in coats and thicknesses.
Three typical walls and how the scratch coat differs
The principle is the same everywhere, but the detail changes with the house. Three common situations show how.
A solid-wall Victorian terrace in soft brick. The old render or pointing is cleared back, the brick dampened to control suction, and a haired lime scratch coat applied and keyed. It’s left for days to firm up, protected from sun and rain, before the next coat. A cement scratch coat here would be stronger and less permeable than the brick, which is exactly what you want to avoid.
A post-war cavity-wall semi in block or common brick. A sand and cement or bagged base render scratch coat is the usual choice. If the wall is reasonably true, two coats may do; if it has been altered or patched over the years, a float coat and some dubbing out are likely.
A house with an extension in a different material. Where old brick meets new block, the two parts absorb water differently and can move independently. Suction has to be judged separately on each, and the junction usually needs reinforcing in the base coats; our guide to render mesh explains how that’s done.
Systems that don’t use a scratch coat
Not every render has one. Thin-coat silicone and acrylic systems go over a mesh-reinforced base coat instead. One-coat monocouche is applied in passes of the same through-coloured material rather than over a separate scratch coat. Insulated render systems are built up over insulation boards with an adhesive and a reinforced base coat.
That doesn’t make those systems better or worse; it means the questions you ask are different. On a thin-coat quote, ask about base coat thickness and mesh. On a traditional quote, ask about the scratch coat. If a quote for traditional sand and cement or lime makes no mention of separate coats at all, ask why.
What a good scratch coat looks like on site
You won’t see the scratch coat once the job is finished, so the time to look is while it’s exposed. Things that suggest it’s been done well:
Even coverage. No bare patches of brick or block showing through, and no obviously thick bulges.
A consistent key. Scores at a similar depth and spacing across the whole wall, including around windows and corners.
Clean edges at beads and openings. The coat worked neatly to beads, reveals and sills rather than left ragged.
Signs of care. Sheeting or shading in poor weather, and no rush to cover it the next morning.
Fine shrinkage cracks across a firm scratch coat are normal and expected. What you don’t want to see is a coat that crumbles when rubbed, sounds hollow when tapped or has come away from the wall.
What goes wrong when the scratch coat is rushed
Next coat on too soon. Shrinkage in the scratch coat cracks the coat above it, and the trapped moisture slows everything down.
Weak or patchy key. The next coat has nothing to hold, leading to hollow, drummy patches that can later bulge and come away.
One heavy coat instead of stages. Sagging, slumping and deep shrinkage cracks.
Dried too fast or frosted. A powdery, weak layer with a poor bond to the wall.
Too strong for the wall. A hard mix on soft masonry that cracks the wall face or holds damp behind it.
Want a renderer who gives every coat the time it needs? SmartMatch™ pairs you with one vetted local specialist for a free survey and written quote.
Get a free quote →How scratch coat problems show up years later
None of these faults shows on the day the finish goes on. They surface over the first winters, when frost and moisture find the weak point. Typical signs include cracking that follows a pattern across a wall, areas that sound hollow when tapped gently, bulges, and sections that eventually fall away to reveal a clean, smooth back with little sign of bond.
Hollow render isn’t always the scratch coat’s fault — water ingress, movement and age all play a part — but a poor first coat is a common root cause. Our guides to render cracking and blown render help you read the patterns and decide what to do next.
The scratch coat in patch repairs
A proper patch repair to traditional render isn’t just a single coat of filler. The damaged area is cut back to sound render, the wall is prepared, and the coats are rebuilt in sequence — scratch coat first, keyed and left to firm up, then the following coats to match the surrounding thickness and finish.
That’s why a good repair takes longer than people expect. A one-visit patch on a traditional render, filled in one go, is more likely to shrink, crack round its edges or come loose. Our render repair page explains how repairs are approached.
Where the scratch coat sits in your quote
You won’t usually see the scratch coat priced on its own line. It sits inside the per-m² rate for the whole system, together with preparation, any dubbing out and the time spent waiting between coats. As an indicative guide, traditional sand and cement render typically costs around indicative £35–£60 per m² installed, and lime around indicative £70–£125 per m².
What moves the figure is mostly labour and time: how much preparation the wall needs, whether it needs dubbing out, whether it’s two or three coats, and how much weather protection is involved. Our house rendering cost guide turns those rates into whole-house figures. If two quotes for the same wall are far apart, ask each to describe its coats; the cheaper one sometimes has fewer or thinner ones.
What to ask your renderer about the scratch coat
Is this a two- or three-coat system, and why for my wall? How will you prepare the wall and control suction? What mix or product is the scratch coat, and is it weaker than my masonry? Will any areas need dubbing out first? How long will it cure before the next coat, and what happens if the weather turns? Can I see the keyed scratch coat before it’s covered?
A renderer who answers with reference to your walls, rather than a standard schedule, is the one to trust. Our list of questions to ask a renderer covers the rest of the job.
Getting the first coat right on your house
Not every house needs a traditional build-up. Modern thin-coat systems skip the scratch coat entirely, and if your existing render is sound, a repair may be all that’s needed. Where a traditional sand and cement render or lime system is right, the scratch coat is where quality starts. Our exterior rendering guide compares the systems.
SmartMatch™ weighs render-type experience, verified reviews, online reputation, insurance and accreditation to pair you with one vetted local specialist for a free, no-obligation survey and written quote. Most of our specialists take on projects from around £3,500, so they’re best suited to larger repairs and re-renders; for a single small job, a local builder or plasterer may be quicker.
Frequently asked questions
What is a scratch coat in rendering?
Why is it called a scratch coat?
How thick should a scratch coat be?
How long should a scratch coat dry before the next coat?
Is a scratch coat the same as a base coat?
Do all renders need a scratch coat?
Does the pattern of the scratch lines matter?
Is it normal for a scratch coat to crack?
Can a scratch coat be applied in winter?
Why should the scratch coat be weaker than the wall?
Get the first coat right
Tell us about your property and SmartMatch™ pairs you with one vetted local render specialist for a free, no-obligation survey and a written quote that sets out every coat.
Get a free quote →