Silicone render finishes are mostly defined by grain size — the largest aggregate in the finish coat, commonly offered (ranges differ between brands) as fine (around 1mm), medium (around 1.5mm) and coarse (around 2mm or more) — and by how that coat is worked: floated for an even, sandpaper-like texture, or dragged into rustic grooved patterns, with scraped and dashed finishes available on some thicker silicone-modified systems. Finer grains look sleeker but show uneven walls, lap marks and patch repairs; coarser grains hide them but give dirt more to cling to. Medium grain is the usual choice for UK re-renders. Grain size moves the price only slightly within the indicative £65–£95 per m² for silicone; preparation and access matter far more.
- Grain size is the biggest single decision in a silicone finish.
- Thin-coat finishes go on at roughly the thickness of their largest grain.
- Fine grains look sleek but show every flaw, lap and repair.
- Medium grain is the usual all-rounder for UK re-renders.
- Coarser and rustic textures hide more but hold more dirt.
- Grain barely moves the price within indicative £65–£95 per m²; preparation does.
What “finish” means on a silicone render
A thin-coat silicone render system is built in layers: a base coat with reinforcing mesh bedded into it, a primer, then the finish coat. Only the last layer is visible, and it’s the only one you choose by eye. It carries the colour and the texture, and it’s the layer most responsible for water-repellence.
That finish coat is a paste of silicone resin, binders, pigments and graded mineral aggregate. The aggregate is what makes the texture. Manufacturers grade their finishes by the size of the largest particle in the mix, and the finish is spread at roughly that thickness, so a 1.5mm finish is a coat about one grain deep. As the installer works it, those largest grains roll and settle side by side, and the surface you see is essentially a single layer of them.
So when a renderer asks which finish you want, they usually mean two things: which grain size, and how it will be worked. The rest of this guide takes those in turn.
Silicone render grain sizes explained
Ranges differ between brands, but most UK silicone finishes are offered in a handful of grades, commonly somewhere between around 1mm and 2mm, with some ranges going finer or coarser.
| Fine (around 1mm) | Medium (around 1.5mm) | Coarse (around 2mm+) | |
|---|---|---|---|
| Look from the street | Almost smooth, crisp | Clean, soft texture | Visibly textured |
| Flatness of wall needed | High | Moderate | Lower |
| Hides laps and patching | Poorly | Reasonably | Well |
| Holds dirt | Least | Moderate | Most |
| Material per m² | Lowest | Middle | Highest |
| Typical use | Feature panels, small modern elevations | Most whole-house re-renders | Uneven walls, robust or rustic looks |
Generalisations: the wall, the product and the installer matter as much as the grade.
Fine grain: sleek, but unforgiving
A fine grain gives the closest thing to a smooth wall you’ll get from a standard thin-coat silicone. From a few metres away it reads as flat and modern, it shows colour crisply, and with fewer ledges for dirt it tends to stay cleaner.
The catch is that it hides almost nothing. Any ripple in the base coat, any slight step where two areas of base coat meet, and any change in the installer’s hand shows through, especially in low sun. Fine finishes are also the hardest to apply evenly across a big elevation: the coat is so thin that the working edge dries quickly, and any join where fresh material meets drying material can leave a visible lap.
For that reason, many renderers reserve the finest grades for small areas — a feature panel, a porch, a bay — or for very well-prepared new blockwork, and are cautious about using them across a whole two-storey elevation.
Medium grain: the everyday all-rounder
Medium grain, usually around 1.5mm, is the grade most renderers default to for whole-house work. It still looks clean and contemporary from the street, but there’s enough texture to soften slight unevenness in the wall, disguise minor variations in application and make a future repair far easier to blend.
It’s also the most forgiving grade to apply, which matters more than it sounds: a finish that tolerates small variations in the installer’s hand is more likely to come out uniform across a large elevation. If you have no strong preference, medium grain is the sensible default.

Coarse grain: texture that hides a lot
Coarser grades, around 2mm and sometimes more, give a visibly textured, slightly granular surface. They follow an imperfect wall without drawing attention to its dips, hide the transition between old and new work, and make patch repairs much harder to spot. On a house being re-rendered over old, uneven render or rough brickwork, a coarse grain can look better than a fine one precisely because it doesn’t try to be flat.
The trade-off is surface area. More texture means more tiny hollows where dust, traffic grime and spores can lodge, so on a damp, shaded elevation a coarse finish may need cleaning sooner. It also makes colours read slightly darker and softer, because each grain throws a small shadow. Coarse finishes use more material per square metre too, which nudges the price up slightly.
Floated (rubbed) finishes
Almost all thin-coat silicone is “floated” — sometimes called rubbed. The finish is spread on with a stainless trowel at grain thickness, then worked with a plastic float while still wet. The float rolls the largest grains into a single even layer, giving the familiar sandpaper-like texture.
How the float is moved changes the look subtly. Small circular strokes give the most even, non-directional texture and are the usual default. Straight vertical or horizontal strokes leave a faintly directional grain that some people like on modern houses. Whatever pattern is agreed, it has to be consistent across the house: a change of direction or pressure between installers, or between morning and afternoon, can show as a patch of slightly different texture in raking light.
That’s one reason experienced teams put the same person on the float across an elevation where they can, and work in a planned sequence from corner to corner.
Rustic, grooved and other textured patterns
Some silicone ranges include a “rustic” or grooved grade, sometimes described as rilled. These mixes contain a few larger grains among the fine aggregate. As the float passes, those larger grains are dragged along the surface and cut short grooves, creating a wormed or scored texture. The pattern depends on the float movement: circular strokes give swirls, straight strokes give vertical or horizontal scoring.
Other installers offer hand-textured looks, sometimes loosely called ragged or stippled, made by working the wet finish with a sponge, cloth or roller. Terminology varies a lot, so judge from a sample board rather than a name.
These textures can suit traditional or rural houses where a flat, uniform grain looks too new, and they hide uneven walls well. But they are harder to repair invisibly, harder to clean, and very hard to match if you ever extend the house or need a patch, because the exact pattern relied on one person’s hand on one day. Make sure you’ve seen a finished house in the pattern, not just a small sample.
Scraped silicone finishes
“Scraped” is a term you’ll hear a lot, and it causes confusion. Strictly, a scraped finish belongs to thicker, through-coloured renders applied in one or two passes and then scraped back with a toothed or nail-board tool once partly set, exposing a soft, slightly open matt surface. That’s the standard monocouche finish, and some manufacturers make silicone-modified versions of these thicker renders with the same scraped look.
A true thin-coat silicone isn’t scraped: it’s floated. Some installers describe any fine, flat-looking silicone finish as “scraped”, so if a quote says scraped, ask which product it is and how thick it goes on. The difference matters, because a thick scraped render and a thin-coat floated finish behave differently over insulation, on movement and in repairs.
Dash finishes with silicone systems
If you like the robust look of roughcast or dry dash but want a modern through-coloured system, some manufacturers offer one. A silicone-modified receiver coat is applied, and clean stone chippings or a coloured aggregate are thrown or sprayed into it while wet, then lightly pressed in. The result looks like traditional pebbledash, but with a coloured, water-repellent background between the stones rather than a painted one.
Dash finishes are hard-wearing and very good at hiding uneven walls and marks, and they suit streets of inter-war and post-war houses where the original finish was dashed. They’re harder to clean than a floated finish and make later repairs and alterations more involved. For one example of the approach, see our guide to K-Rend roughcast.
How the finish changes the colour you see
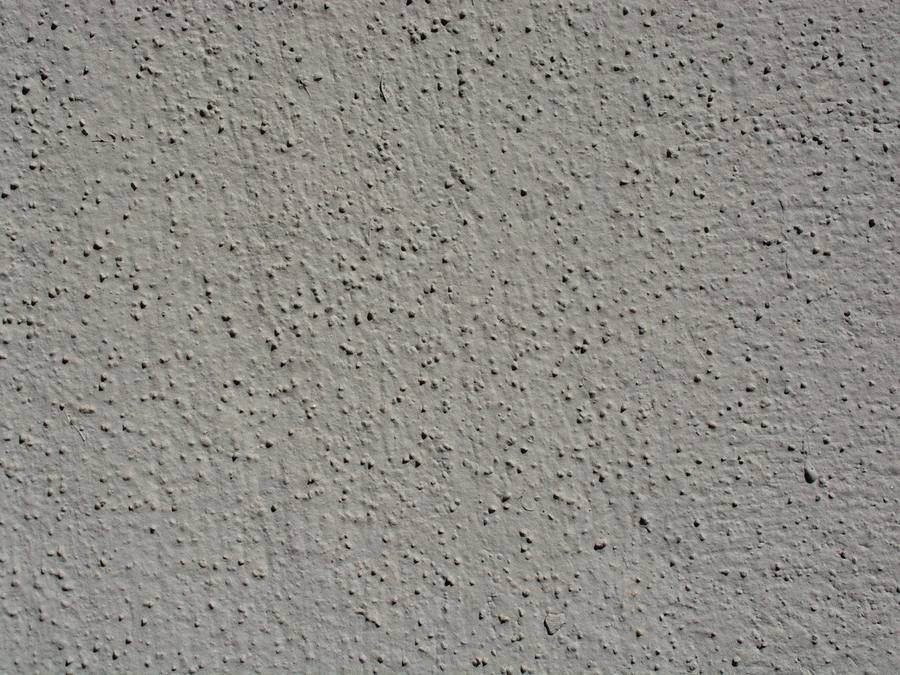
Grain size and colour work together. Each grain casts a tiny shadow, so a coarse finish makes the same shade look a touch darker and less uniform than a fine one, and a rustic texture deepens it further. A brilliant white in a 2mm grain can read slightly creamy; a pale grey can drift towards mid grey. Fine grains show the colour closest to the chart.
That’s why the colour sample must be in the grain you’re having. If you’re still choosing a shade, our guide to silicone render colours covers the popular families; for the broader question of whether you want a smooth or textured look at all, across every render type, see textured vs smooth render. On a whole house in brilliant white, finish choice also affects upkeep, which our white render house guide covers.
How grain size affects coverage and material use
Because the finish is applied at grain thickness, a coarser grade simply needs more material for every square metre. Manufacturers publish consumption rates in kilograms per square metre for each grade, and a good quote is built from them, with an allowance for waste.
Coverage also depends on the wall. A flat, well-floated base coat gets close to the published rate; an uneven one eats material as the finish fills hollows. That’s another reason fine grains need a better-prepared background: they can’t fill much without the hollows showing.
Labour changes too. Fine grains are slower to apply well over large areas; rustic patterns take more time per square metre; dash finishes add a separate stage. None of this is dramatic on a typical house, but it explains why two grades from the same range aren’t always the same price.
Dirt pick-up and algae by finish
Silicone’s strong water-repellence is its best defence against dirt: rain beads and runs off, and the surface dries quickly, so spores and grime have less time to settle. Many finishes also carry a biocide that slows algae for the early years. Texture modifies that defence rather than replacing it.
On a sunny, well-detailed elevation, grain size makes little practical difference to how clean the wall stays. On a north-facing wall under trees, or beside a busy road, finer grains generally stay cleaner and are easier to wash, while coarse and rustic textures hold more in their hollows and need a little more biocide and patience to clean. Whatever the finish, cleaning means a render-safe biocide and a gentle rinse, never a pressure washer, which can erode the grain itself. Our guide to algae on render explains the treatment in full.
Choosing a silicone finish? SmartMatch™ pairs you with one vetted local specialist who can bring sample boards in your colour and grain to your own walls.
Get a free quote →How each finish takes a repair
Every render needs a repair at some point: a new extractor vent, a moved satellite dish, a crack at a window corner. On a through-coloured silicone, a repair has three things to match — colour, grain and the way it was floated — against a wall that has weathered for years.
Fine grains are the hardest to blend: any difference in texture or sheen shows as a patch. Medium grains blend reasonably, especially if the repair runs to a natural edge. Coarse and rustic textures hide the joint best, though a rustic pattern has to be imitated by hand. On any grade, the neatest repairs run to a corner, bead or window line rather than stopping mid-wall, and on prominent elevations a renderer may suggest re-coating the whole face.
You can make future repairs easier now. Ask your installer to write down the manufacturer, product name, grain size, colour reference and batch numbers used, and keep that record with the house paperwork. A repair matched to the exact product and colour starts with a far better chance. Leftover finish is less useful than it sounds: opened tubs have a limited shelf life.
Sample boards and test panels
A small printed swatch tells you almost nothing about a finish. Texture only shows its character at scale and in changing light.
Ask for sample boards in the exact product, grain and colour you’re considering, ideally two grades side by side. Hold them against the wall in the morning, at midday and in late afternoon, including when the sun is low and raking across the face.
Ask to see a finished house. A good renderer can usually point you to recent jobs in the same finish. Look from across the road and up close; check the corners, the reveals and the line between scaffold lifts.
Consider a test panel on a larger job. A square metre or so applied somewhere discreet, such as a side return, shows you the finish on your own background in your own light, and shows the installer how the wall takes it.
Agree the float pattern as well as the grain, and get both written on the quote alongside the colour reference.
What a well-applied finish looks like
Finish quality is where installer skill shows most. On a good silicone job you should see an even texture across each elevation, with no lap marks where one day’s work met the next. There should be no horizontal bands at the height of each scaffold lift, a common giveaway that the elevation wasn’t worked continuously from top to bottom. Colour should be consistent, without blotches from application in hot sun, frost or rain, and no grey shadows of base coat or mesh showing through. Corners, reveals and bead lines should be crisp, with the finish running neatly to each bead.
These faults are usually down to application conditions, team size or a missing tinted primer rather than the product. Our guide to silicone render problems covers what causes them and what to do if you see them on a recent job.
Do silicone render finishes cost different amounts?
Within one system, not by much. As an indicative guide, silicone render typically costs around indicative £65–£95 per m² supplied and applied on a sound wall, and the choice between fine, medium and coarse grain usually moves a quote only a little within that range. Coarser grains use more material; fine grains may need more preparation and labour; rustic textures and dash finishes add time or an extra stage, so they tend to sit towards the upper end.
The bigger drivers are elsewhere: the condition of the wall, whether old render or pebbledash must come off (stripping and re-rendering typically runs indicative £100–£170 per m²), scaffolding and access, and the number of elevations. By walls, a single elevation typically comes to indicative £3,500–£5,000 and four or more walls £12,000–£17,000+.
Ask for the finish grade to be named on each quote so you’re comparing like with like. Our guides to silicone render cost and house rendering cost break down the rest.
Choosing a silicone finish for your house
New, well-built blockwork or a contemporary house: a fine to medium grain, with fine reserved for smaller areas unless the base coat is exceptionally flat.
Re-rendering over old render or after stripping pebbledash: medium grain, or coarse if the wall is noticeably uneven after preparation.
Insulated render systems: follow the manufacturer’s specification, which may set a minimum grain or rule out the finest grades over insulation boards.
A street of dashed or roughcast houses: a dash finish or a coarse grain keeps the house in character; a fine grain can look out of place.
Shaded, damp or roadside elevations: lean finer, in a system with good biocide protection, to slow dirt build-up.
You expect alterations: if new windows, an extension or fittings are likely, medium or coarse grain makes the later patching far less visible.
Brand ranges differ in the grades and textures they offer, so a particular look can steer the system choice; our guide to the best silicone render brands compares the main ones.
When a silicone finish might not be right for you
You want a truly smooth, polished look. Even the finest thin-coat grain has a texture. A dead-flat stucco look is better achieved with a floated lime or traditional smooth render, often painted or limewashed.
The house is old and solid-walled. Many older solid-walled houses, built before cavity walls became the norm, need a breathable lime system rather than a modern thin coat, whatever the finish.
You need to match an existing traditional finish. If you’re extending a roughcast or Tyrolean house, a silicone finish may never quite match, and a like-for-like traditional render may look better.
The wall has unresolved damp, movement or failing render. The finish is the last decision; the background comes first.
Some homeowners with sound existing render who simply want a fresher look also consider wall coatings.
Getting your silicone finish right
The right finish is chosen at the survey, with sample boards on your wall and a renderer who will explain how they’ll prepare the background to suit it. Our exterior rendering guide sets out the wider process, and our silicone render page covers the system itself.
SmartMatch™ weighs render-type experience, verified reviews, online reputation, insurance and accreditation to introduce you to one vetted local specialist for a free, no-obligation survey and written quote. Most of our specialists take on projects from around £3,500, so they’re best suited to larger repairs and re-renders; for a single small job, a local builder or plasterer may be quicker.
Frequently asked questions
What finishes can you get with silicone render?
What grain size is best for silicone render?
What is the difference between 1mm and 2mm silicone render?
Can you get a smooth silicone render finish?
Is silicone render scraped or floated?
Does a coarser silicone finish get dirtier?
Does the grain size change the price of silicone render?
Can a silicone render repair be blended in?
Should I see a sample before choosing a silicone finish?
Does the finish affect how silicone render colours look?
Choose your silicone finish with real samples
Tell us about your property and SmartMatch™ pairs you with one vetted local render specialist for a free, no-obligation survey and written quote.
Get a free quote →